Behind the scenes - Making a virtual pinball machine (Part 1)

I drastically underestimated just how deep this rabbit hole goes. Three weeks ago my knowledge of virtual pinball was just 'Pinball FX 3' on the Nintendo Switch - a great game that lets you run the Switch in portrait mode where you can purchase some great tables from the golden age of William's in the 90's to newer IP digital tables like Jurassic Park World or DOOM.
I was very happy with my limited knowledge, I loved firing up the Switch to have a quick go on Fish Tales or Back To The Future. In fact I was so smitten with it that a few years ago I built 'Pinplo': a virtual pinball table made out of Duplo blocks, powered by the Switch + Pinball FX 3, housing a spare 27" monitor I had. I loved this project, it was really silly fun and I got really obsessed really quickly.
The icing on the cake was finding a 64 x 32 pixel dot matrix display to place above the table. Setting this thing up was a real pain, it's powered by an Adafruit Matrix Portal and whilst getting it working wasn't too bad, getting your own images onto it proved a proper nightmare with endless loops of flashing, re-flashing, deleting and starting all over again. I was never quite sure what I did right in the end, but eventually I got it to display my own little animations I'd made in After Effects.
It was such a pain though that I never touched the set-up again, and that was fine as it was purely ornamental anyways. The dot matrix screen was in no way connected to what was happening on the actual pinball table, it was just a really cool way to get my kids names as part of the table!
So that's where my virtual pinball experience was at until very recently. Parallel to the virtual world though, my good friend Norman Hayes (Founder of Waste Studio) is a fellow designer & artist that happens to have a penchant for pinball, but of the very real variety. He has an amazing collection, so every time we'd hang out we'd literally just play pinball for hours and hours, and that's exactly what happened when we most recently caught up.
Norm playing The Simpsons Pinball Party (2003) at his design studio
We got really excited and ended up sticking a GoPro inside a few of his tables, just because we were curious! Needless to say, it looked as cool as we thought it would!
Sticking a GoPro inside a real pinball machine
Obviously what happens when you're hanging out around real tables is that you really, really, really want one for yourself. That's never been an option though, I can neither afford nor have the space to fit these behemoth's of joy anywhere. And that was fine, I was very happy in my existence of wanting but not owning, I had made my peace with that...
Then, the YouTube algorithm happened. I'm not quite sure why, I guess I'm in the gravitational pull of all this stuff but this video appeared as a suggestion so I tapped it...
It was an eye opener for me, I just did not realise the amount of realism and richness you could get from virtual pinball... and I did not, for a moment, think you could build it yourself. I'm always telling myself I can't do anything that isn't pixels, but the idea of a project like this was really tantalising!
Because I'd dared to watch the first video, my algorithm went into overdrive and all my recommendations were to do with virtual pinball, and I was loving it! This was my second video and by this point it was really starting to cement the idea of 'maybe I could do this!?'
What really sold me on giving it a try was two big factors; first I already had a ready-made PC. About 5 years ago, prior to Apple's silicone-chip Mac's, I was using a beefy Novatech workstation PC for my 3D work and streaming set-up but then when I got my hands on my M2 MacBook Pro, I moved all 3D / streaming stuff over to Mac. Blender and OBS run like a dream on the silicone chips, so sadly I had no use for the PC and its sat in the corner of my studio for the last few years.
The spec was pretty good, but it was always a workstation rather than a gaming machine, and 5 years in PC spec terms might as well be 5 lightyears. Even so, I didn't really know how demanding the pinball software could be, so I could go into this wonderfully naive. This was the spec at the time:
NVIDIA Quadro RTX 4000 8GB GPU
64GB ECC REG Memory
SuperMicro X11SRA Motherboard
BeQuiet 550w Dark Power Pro 11 PSU
By this point I had convinced myself I wanted to do it so the spec didn't really matter - it was a working Windows machine!
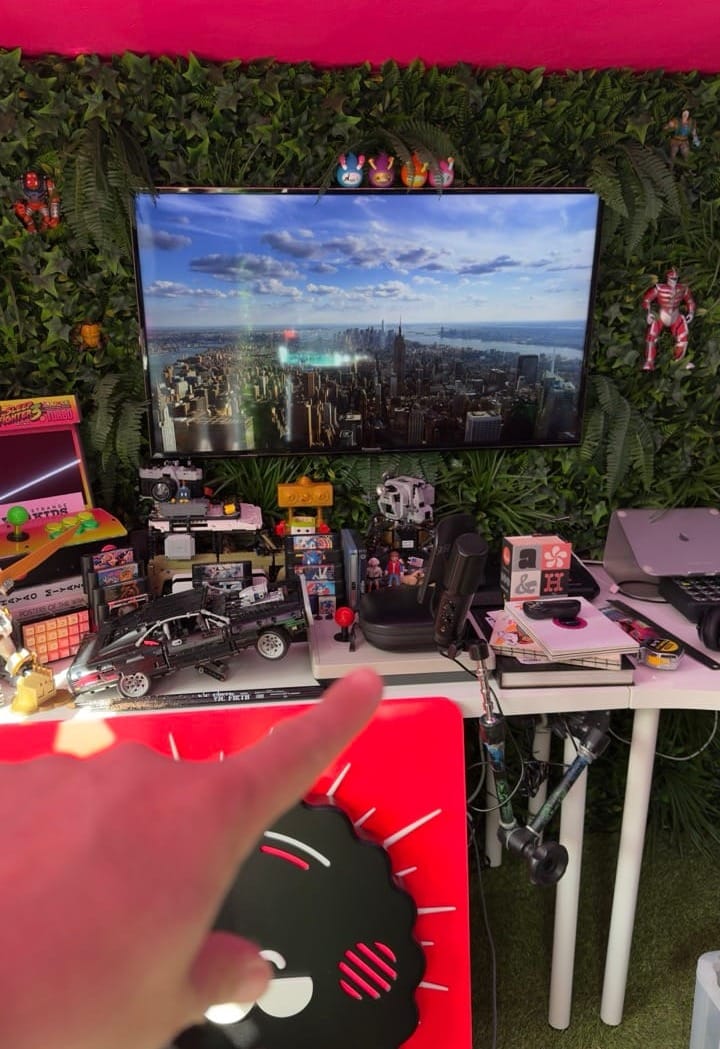
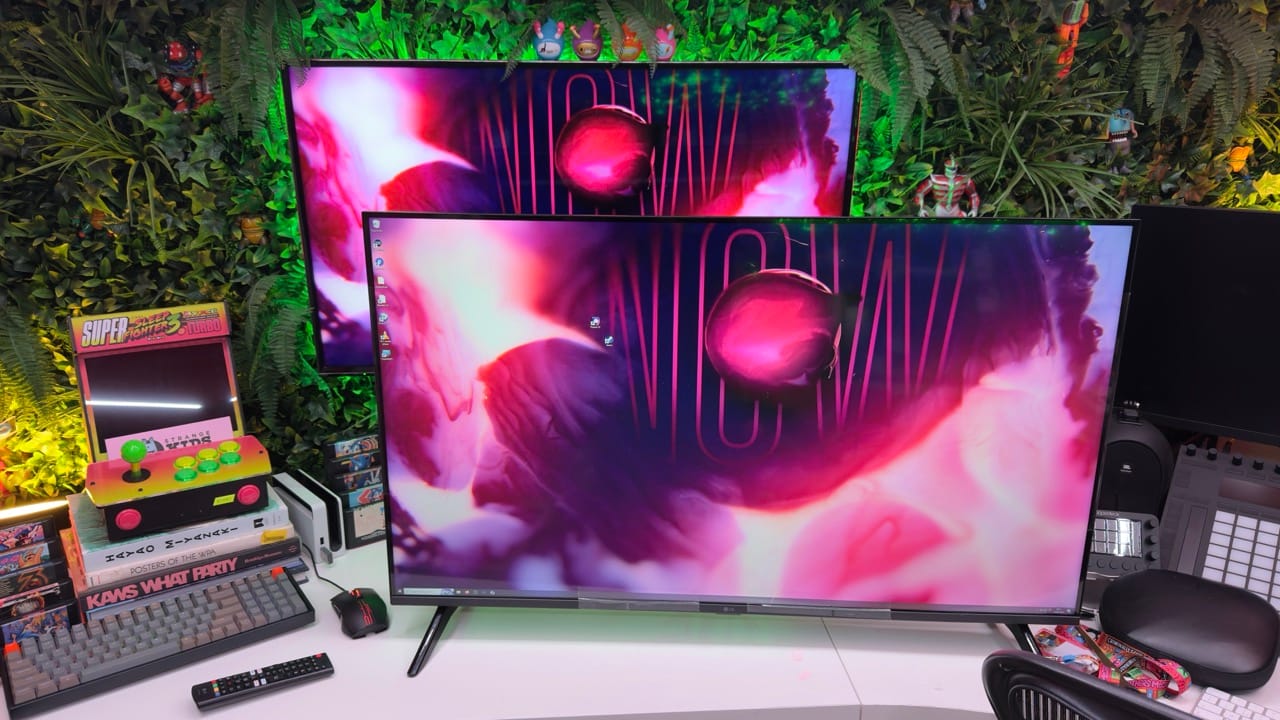
The second factor that helped was I already had a working TV screen in my studio that I could use as the 'backglass' - the bit where the artwork and logo is displayed. Lots of the virtual pinball machines I was seeing were rather large because of both the angled horizontal screen (the 'playfield' where the pinball action takes place) but also because of the upright 'backglass' area that was quite substantial.
I knew that I couldn't fit a normal cabinet size into my small studio, so the fact I already had a screen mounted on the wall with a HDMI switcher plugged into it meant I can use it with my Mac when I'm working, but when I boot up the pinball machine it will take over and become the backglass.
So now the small fact remained that I needed a 'playfield' screen, something that would fit in my space. Thing is though, I didn't want to go small! I'd already built the 'Pinplo', which used a 27" screen, so there was no point making something little again - if I was gonna do this, I should do it proper! So, after lots and lots of forum searching and video watching, I settled on using a 43" TV - which is pretty much 'actual size' for a real pinball table.
I went for a LG 4K TV, which was £250 new. My reasoning was 4K would look great (again, my 'Pinplo' screen was HD so I wanted to have a point of difference) and it could do a 60hz refresh rate. OLED would have been lovely but is super pricey and I didn't / couldn't shell that out on a project I didn't know I would be able to do. Although 60hz is fine - 120hz is the ideal and 144hz+ is generally regarded as the gold standard. In mimicking a real pinball cabinet, the smoother the ball and flippers look in play, the more realistic it looks!
I was really happy with my choice though, it meant I didn't spend loads at all but also I had 'somewhere to go' in the future if I wanted to swap out the playfield screen. So, when the screen arrived it was time to get it plugged in and set-up! My studio space really isn't that big, so I had to have a bit of a clear out and reorganisation to even be able to make it work, and even then it was a constant squeeze!
Buy first, worry about space later
The main ingredient to getting some games of pinball up and running was the 'Baller Installer'. Unbeknownst to me, the process of installing pinball software and the correct emulators and all that jazz could be quite a hassle. It must have been a big barrier to entry but lucky for newcomers like me, the installer by Nailbuster takes the pain out of all of that. So armed with this video, I was away!
There are loads of different screen configurations you can use - 1 screen, 2 screen, 3 screen, 3 screen + dot matrix display, portrait, landscape etc - but I wanted to keep things relatively simple; a 2 screen set up. My 'backglass' art and dot matrix display would all go on the TV at the back, and the game action 'playfield' would be the LG TV that I was laying down flat. The 'Baller Installer' made this a breeze, and I was up and running in about 10 minutes! It helped that prior to doing the actual install I had watched Way Of The Wrench's playlist a couple of times so it felt somewhat familiar.
With the install of the software successful, I decided to follow WOTW's video on how to actually install the pinball tables you want to play:
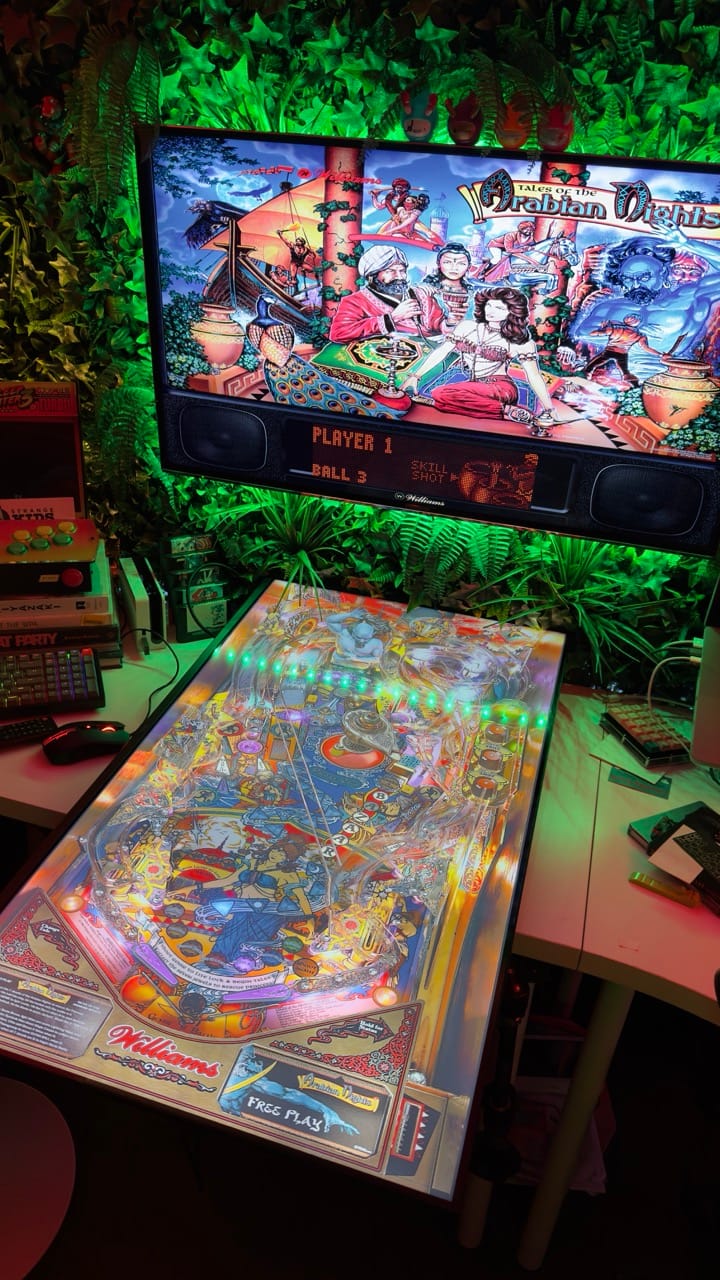
Adding tables is definitely a little bit fiddly, but once you get the knack of it, it's super simple. I followed WOTW's tutorial to the letter and decided to source the same table he did - Williams' 1996 'Tales Of The Arabian Nights' - and I am so glad I did, because it's an incredible introduction to the world of virtual pinball! This table in particular is a 4K recreation, it uses the most modern physics engine and has dynamic LUT's that let you style the table with different types of lighting!
Just seeing it load up, even when the TV was in its normal position blew me away, and it was super exciting!
Laying the playfield TV flat and in portrait mode really made it feel real, and I knew there and then that I was going to be absolutely hooked on this thing!!
So, it looked great... but, it didn't quite play as good as it looked! Turns out, that Quadro 4000 GPU couldn't deliver 60hz @ 4K resolution, so I was only getting 30fps. For speedy pinballs flying around, that's not really good enough. Plus, it gave me serious flipper lag! I had a real noticeable input lag between hitting the button and the flipper moving.
Because this project was really just an excited dabble into something that looked fun, 'buy a new GPU' really wasn't on my list so I figured I'd just make do with a lovely-looking-but-slightly-slow-playing machine! I happened to mention the GPU thing on the Happy Place discord I'm a part of, and my good friend Jaz mentioned that she'd seen someone selling a second-hand GPU online - it was like it was meant to be! That person was lovely human Jamie Knight, who also kindly offered to do a Facetime call with me to help me install said GPU, as I'd never done that before!
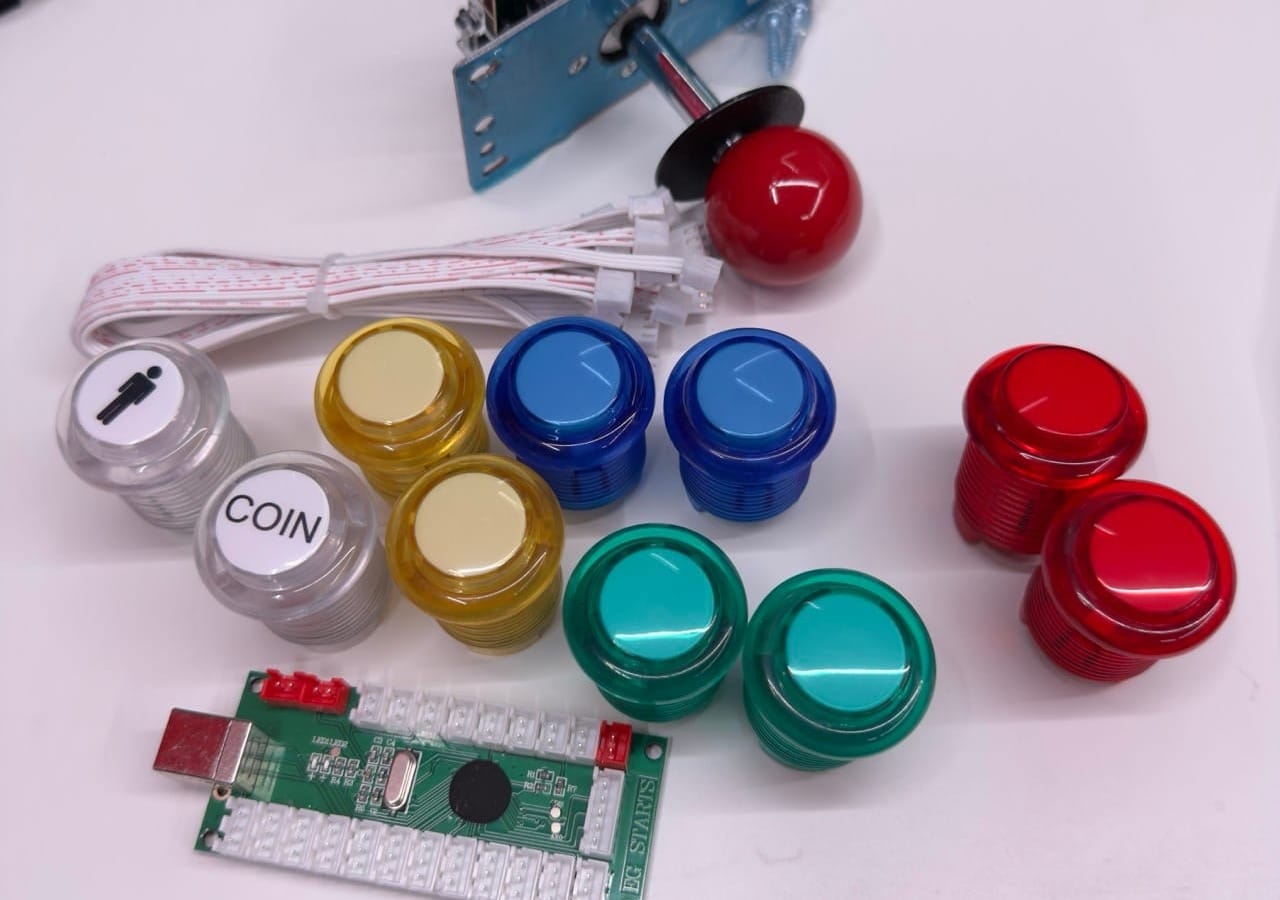
In the meantime of waiting for the GPU to arrive, I wanted to set-up some buttons to make my pinball experience a bit more authentic! I bought the 'EG Starts' kit that featured 10 illuminated buttons wired to a USB board that could just be plugged directly into the PC, as Windows just recognises it as a 'generic game controller'.
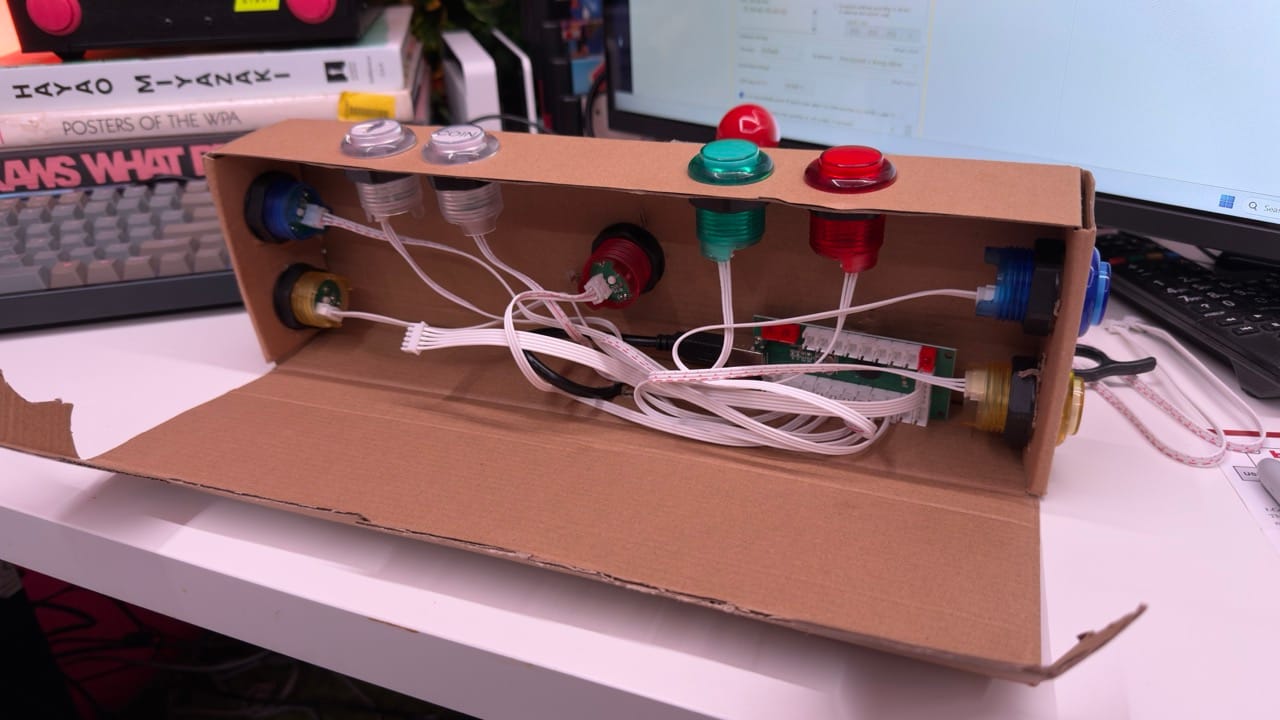
I wanted to house the buttons in something that would feel more 'pinball-ey'. I had figured I'd maybe 3D print something in the future, but for right away I just used whatever I had to hand - cardboard!
Voila! It worked great! It was surprisingly easy to set-up once I'd found where the button debugger was hidden inside Windows 11! (Oh that's another fun detour that I won't bore you with here - I really needed to jump to Windows 11 from the version 10 I was running, but I couldn't simply upgrade because of some new TPM 2.0 security stuff from Windows, so I had to use 'Rufus' to help me create a new bootable fresh install of 11!)
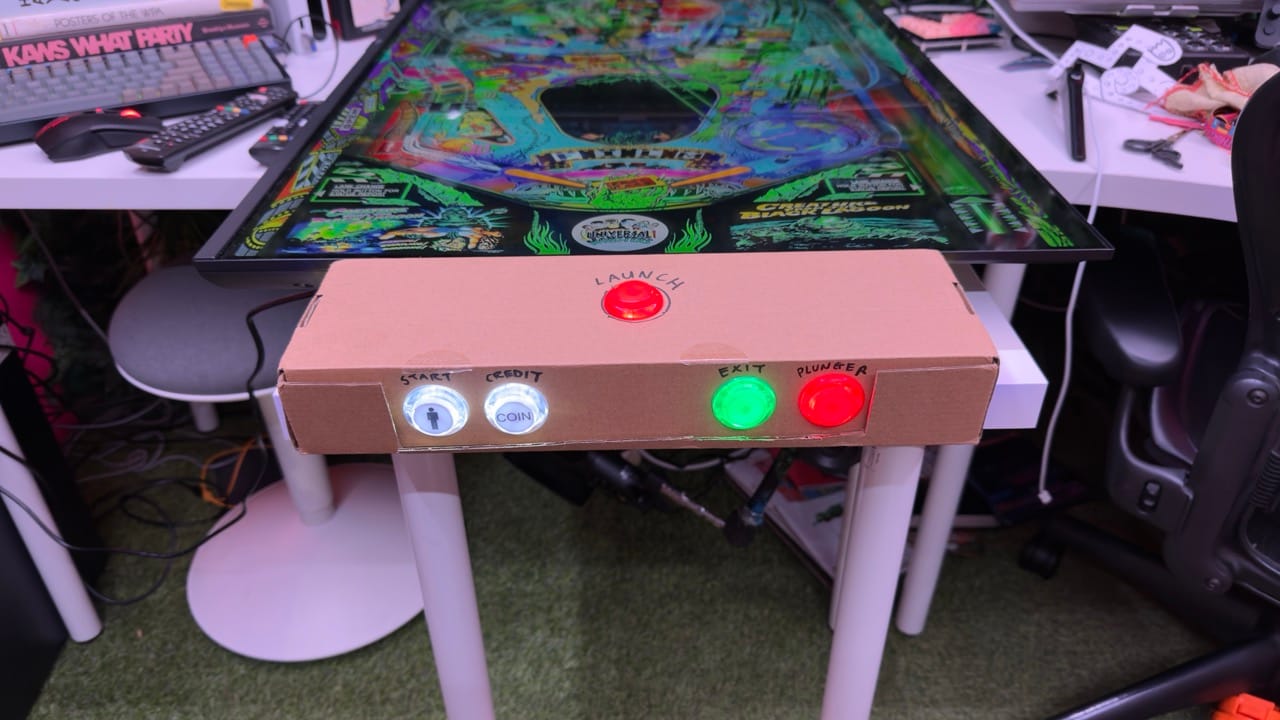
At the same time - again using the 'use what you know' method - I bought the slim Ikea table top and legs to let me lay the playfield TV down flat with space for this new button box at the bottom, it worked great! However, having the buttons only highlighted how bad the flipper lag was, luckily for me, the new GPU from Jamie had arrived!
Thanks to the very patient Jamie - he talked me through replacing a PSU (a Be Quiet 750w if you were wondering) via a 2.5 hour facetime on the first night, then on the second evening he walked me through installing the new GPU. My PC had a proper glow up that night, going from a Quadro 4000 to a GEFORCE RTX 4070 Super! Zoom zoom!

I was back on with the playfield TV running at 60hz, with VRR enabled and all the bells and whistles! I was running at maximum visual settings too and coupled with some software tweaks - running the OpenGL version of VPX, trying 'frame pacing', noodling some NVIDIA control panel settings - it was now running fantastic!
With the software running well, it was time to try and make my set-up look a bit better and be closer to a cabinet without building an actual cabinet! I realised that on a previous loft trip I had an old Vesa TV mount going spare, so I figured if I attached that to the back of the playfield TV, I could use it to angle the telly to a more favourable pinball incline.
After using a spare bit of wood I'd found to hold the TV up around a 5 degree angle, I realised that it wasn't quite cutting it. Not least because both real pinball and virtual pinball tables are around the 10 degree+ angle. So time to get the 3D printer involved! I used TinkerCAD to model some supports to see if they'd do the job...
I'd actually used my printer - a Bambu A1 Mini - earlier in this process, just to print some little risers to account for the height different in my Ikea table sitting on top of another table top, but now it was time to go with a bit more bespoke.
It printed great and it worked great! I made sure to print on the 'strong' settings and it worked a charm. Man, I love 3D printing!
Going from the 5 degrees it was at to the 10 degrees made all the difference. Doing lots and lots of reading, I found that 10 degrees is really the minimum real tables are positioned at, sometimes even steeper. For now though, this works and just about fits in my space! (Although I will be moving the 'backglass' TV up at a later date).
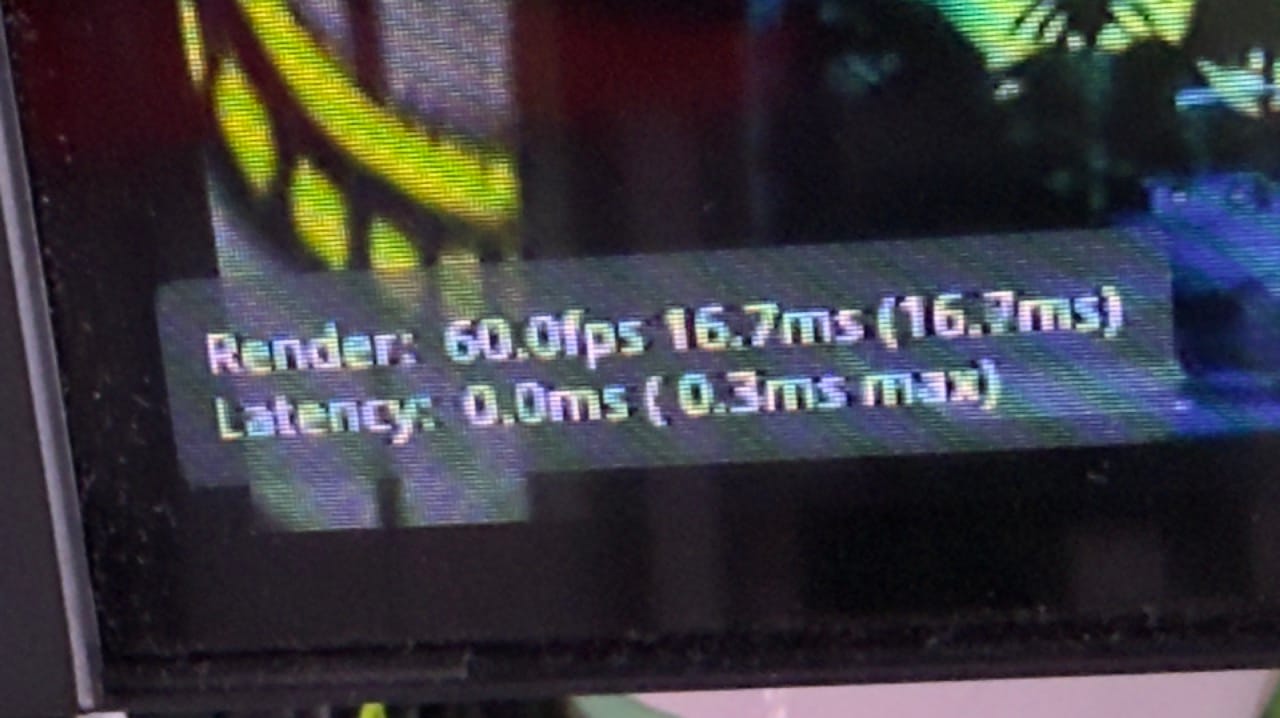
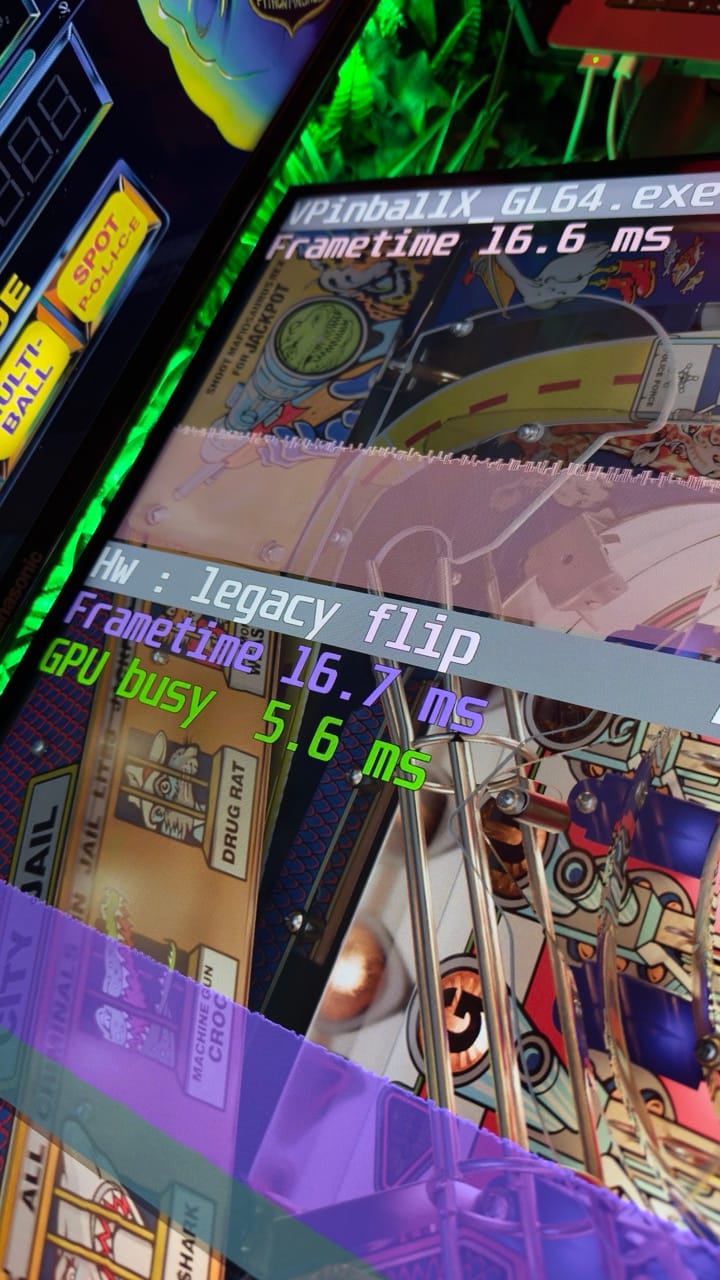
In the middle of all this, I had another Facetime call with the lovely Jamie, who kindly agreed to help me get the absolute most out of the new GPU by running some of his trusted benchmarking tools. Turns out the GPU is happily blazing along, it's the CPU that's holding it back! It runs great for me though, and looks fantastic, so shelling out for a new motherboard to hold said new CPU isn't really on the cards at the mo. It's great to know how it's all running under the hood though, and I'm eternally grateful to Jamie for the time and expertise!
I gotta say though, at this stage it's hard to stay productive because I have a working pinball table with working buttons, so the attraction to actually not do anymore and just spend hours and hours playing different games is really strong. My youngest Sylvie was really taken with it though, and it's super fun seeing her enjoy the lights and sound and madness of it all!
The next creative step was a bit more complicated than printing a couple of stands though, and was a challenge for my little brain: I wanted to design and print a better enclosure for the buttons. The cardboard prototype was working fine, but it had a habit of being knocked off the edge of the table, and this was the perfect time to challenge myself!
So, like all these things, I started off with what I did know - Adobe Illustrator. I measured up the width of the tabletop it's sitting on but also the depth of the TV, which was annoyingly thick on one side due to the speakers, so I couldn't have a lot of height on the enclosure. That cardboard prototype helped wonders though, as that was slim and still let me play comfortably, so my 3D printed version was pretty similar except for a few upgrades.
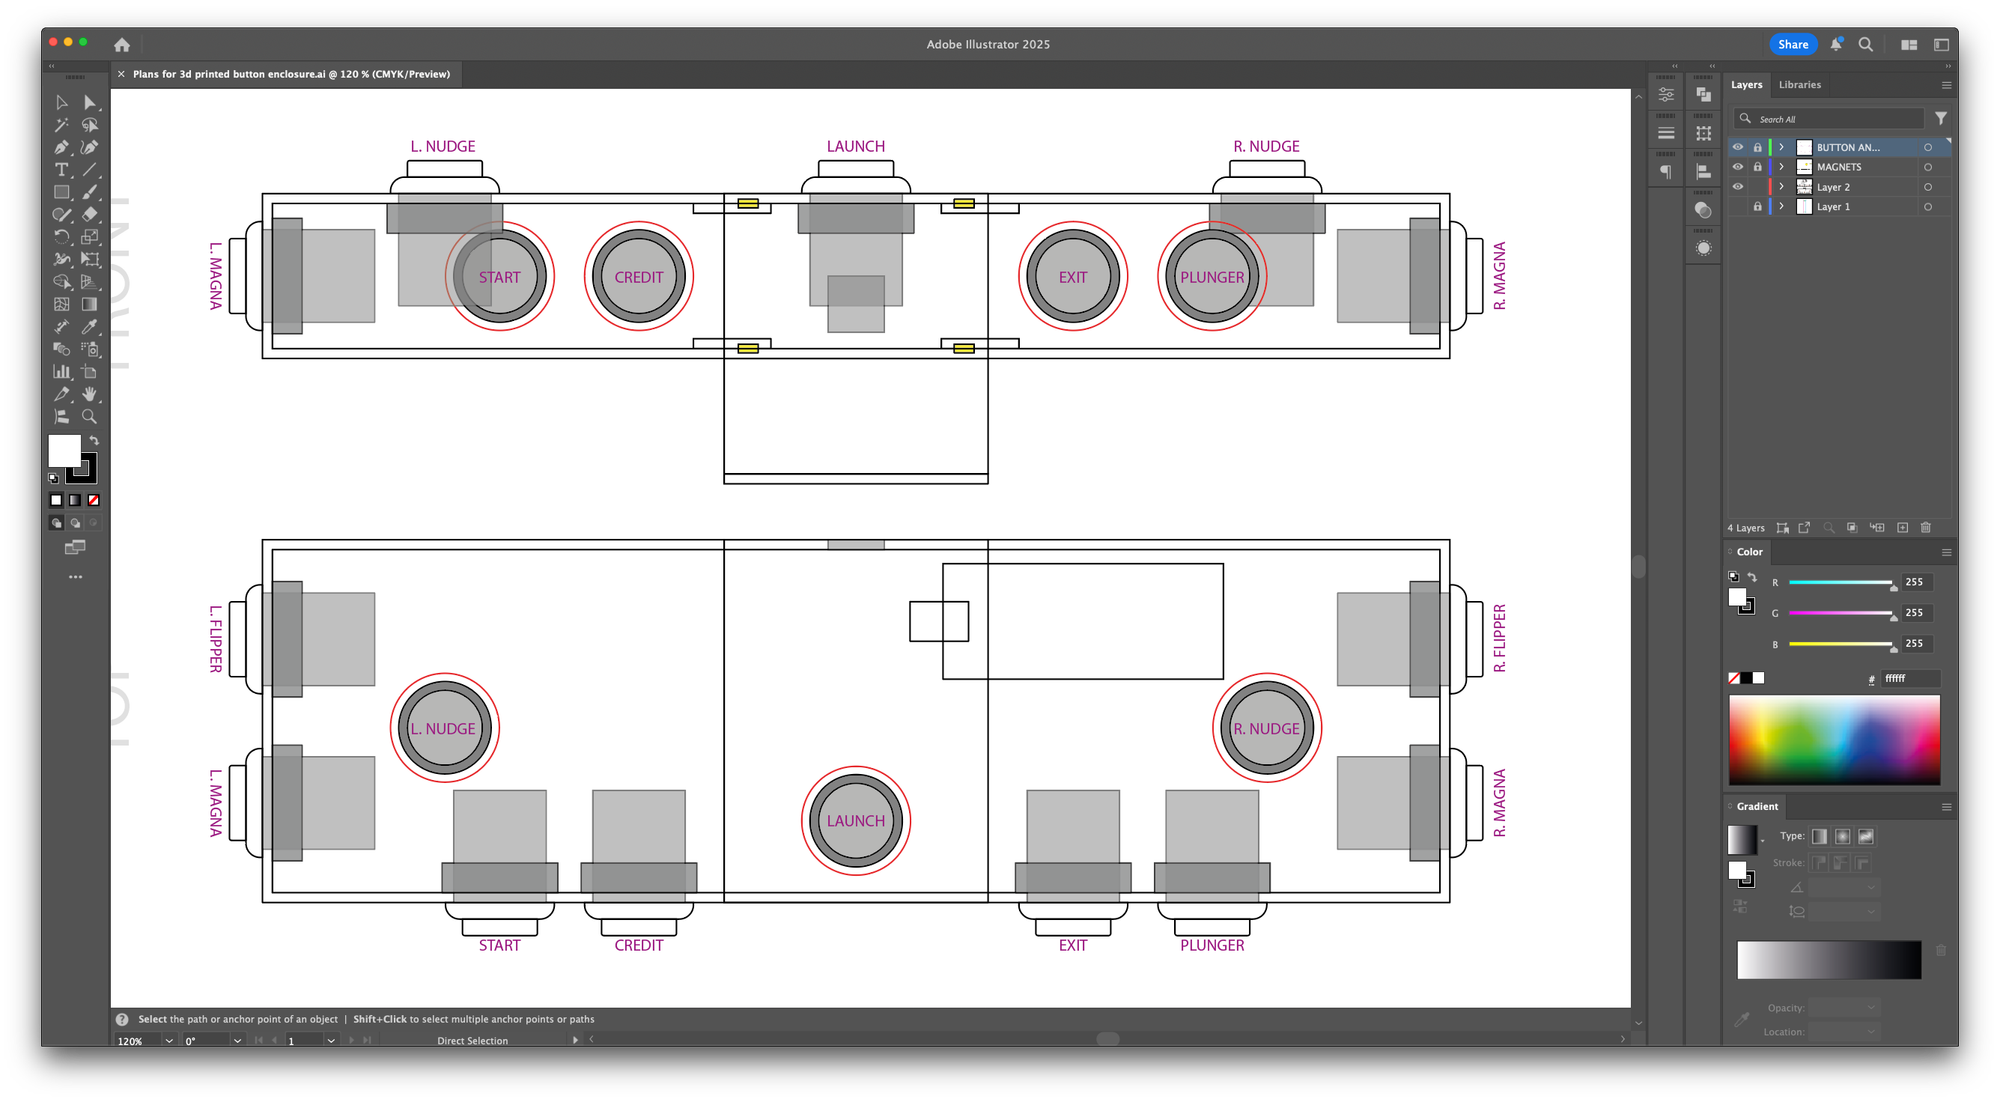
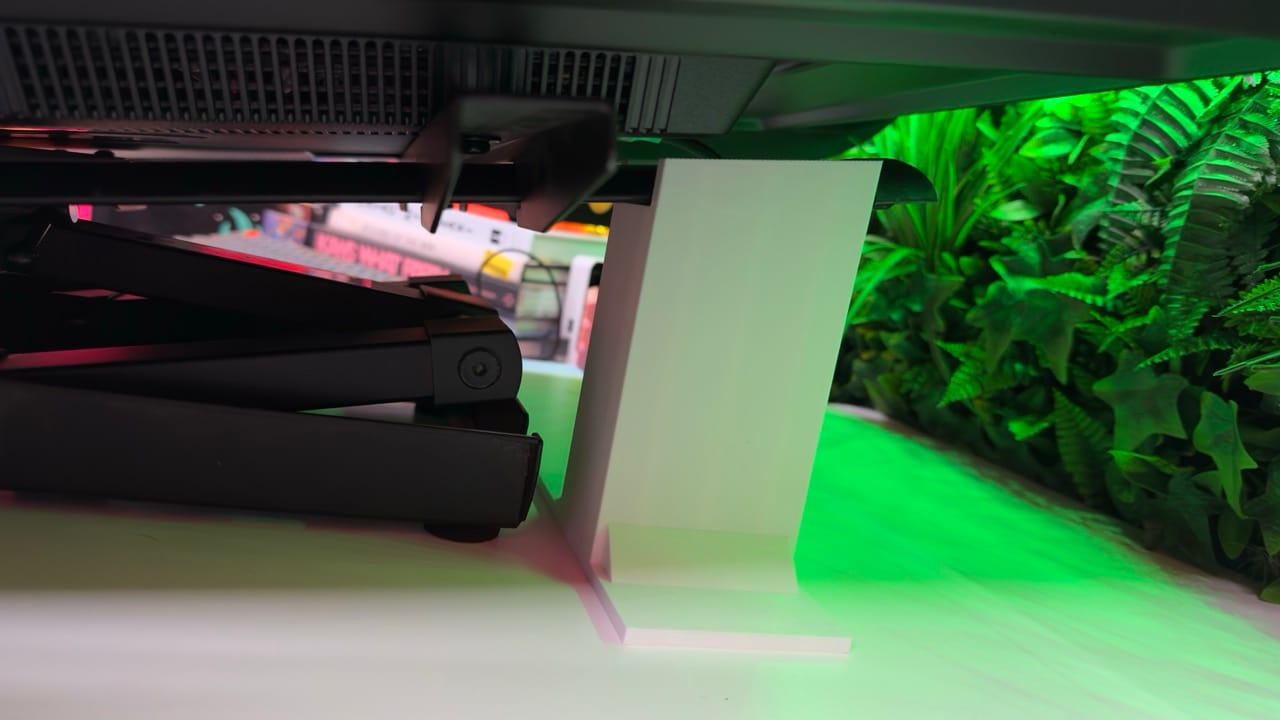
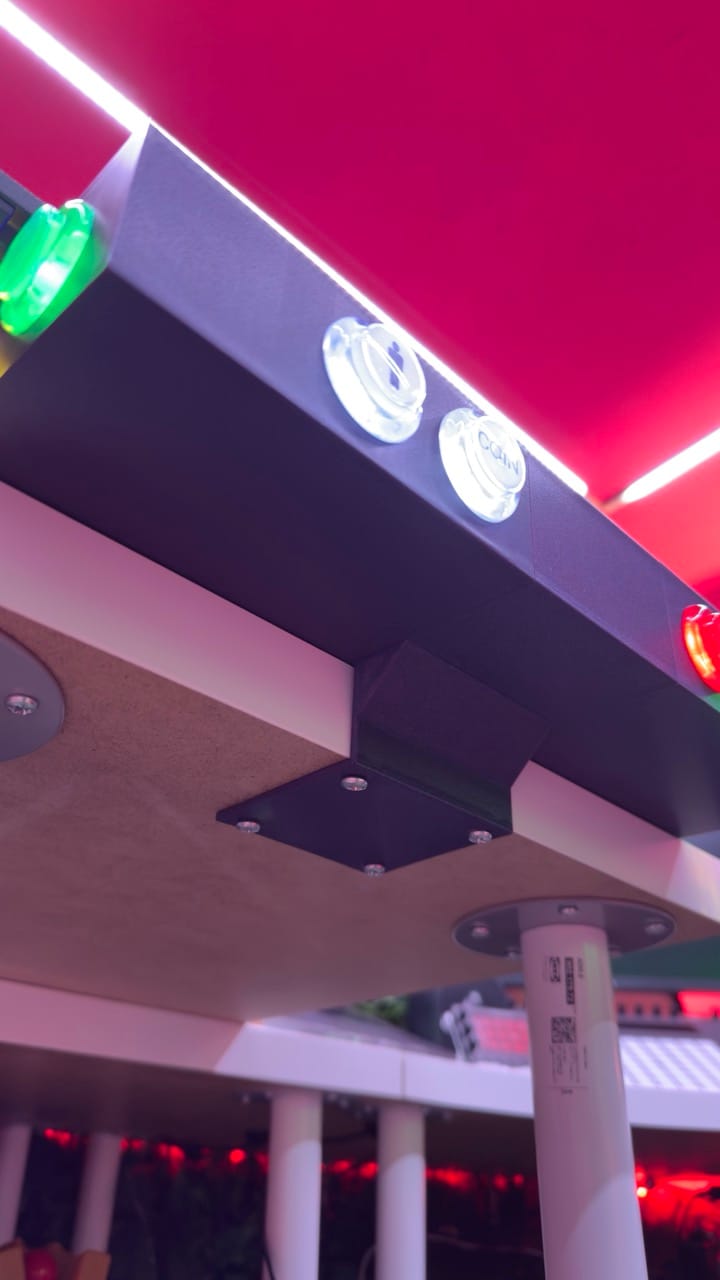
The main one was a bracket of sorts to let me affix it to the table with some fixings. I had some spare screws from the Ikea legs as I'd only used two out of four, so I figured I'd just reuse what I already had and what I knew already worked (I know it sounds silly to be so pedantic about even some little screws, but as I'm out of my comfort zone here, anything that is already a known quantity, no matter how small, really helps me make it feel achievable).
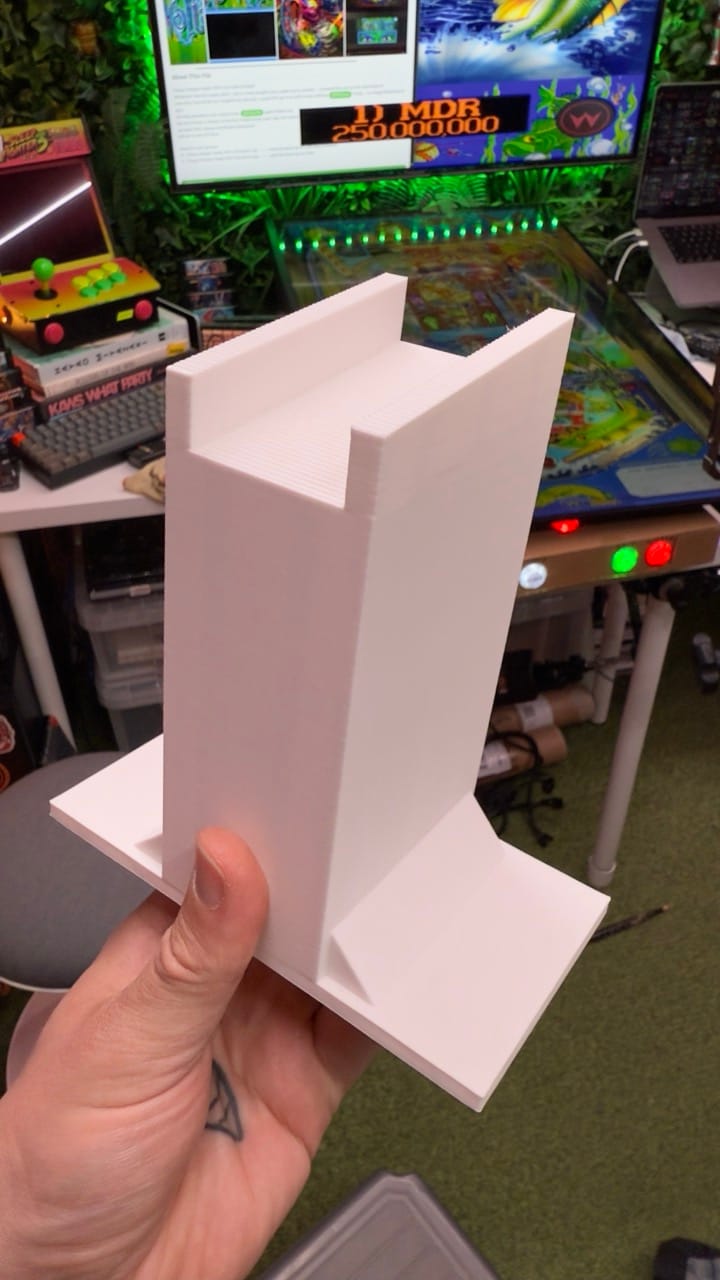
Another thing I had to factor in was the size of the print. I've got the Bambu A1 Mini printer, which has a maximum print size of 180mm³, so I needed to split the enclosure into three parts. Once I was happy with my Illustrator file, I hopped over to browser-based TinkerCAD to start modelling. Tinker is perfect for me, as other CAD programs look pretty overwhelming, so it's a good place to start. It's pretty intuitive (there are quite a few quirks though!) but it has enough for me to muddle through and make something size-accurate.
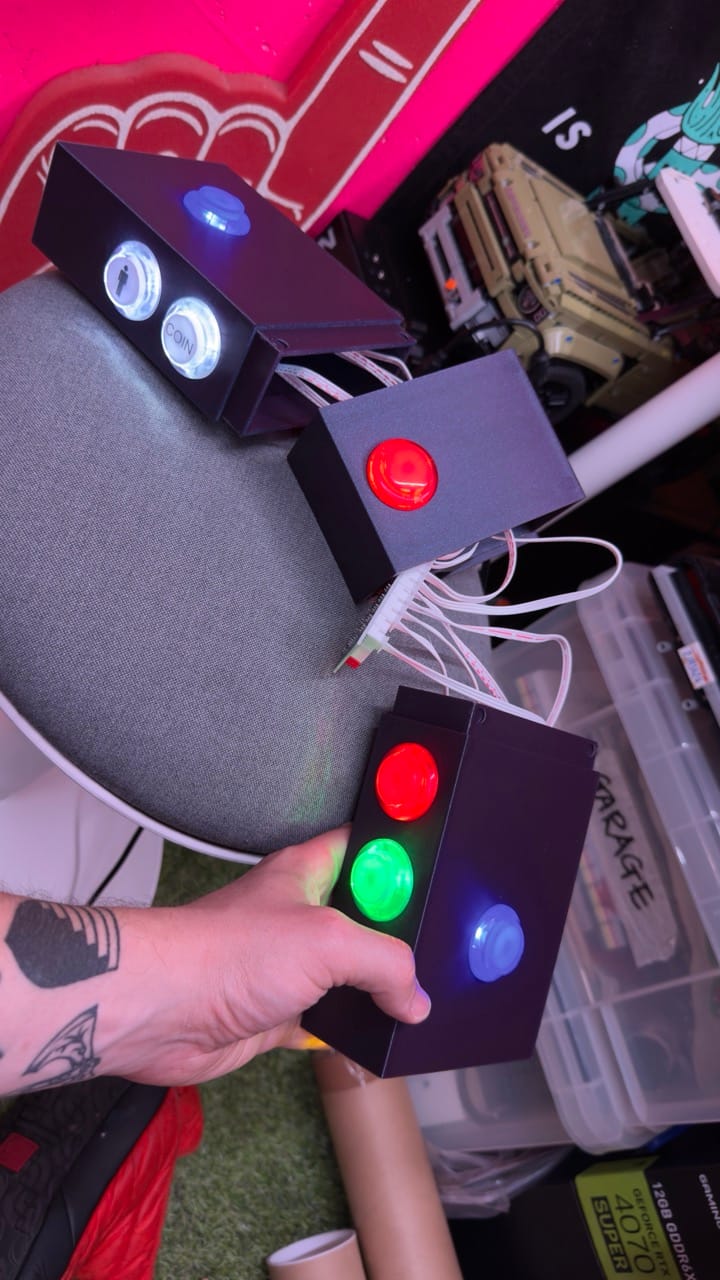
The first thing I printed was the middle part, which had the bracket on the bottom as I figured if I printed this smaller bit first, I could iron out any kinks before I hit go on the big side bits! I was really pleased with how it came out; it was solid, it fit on the edge of the table and the button fitted in the hole just right!
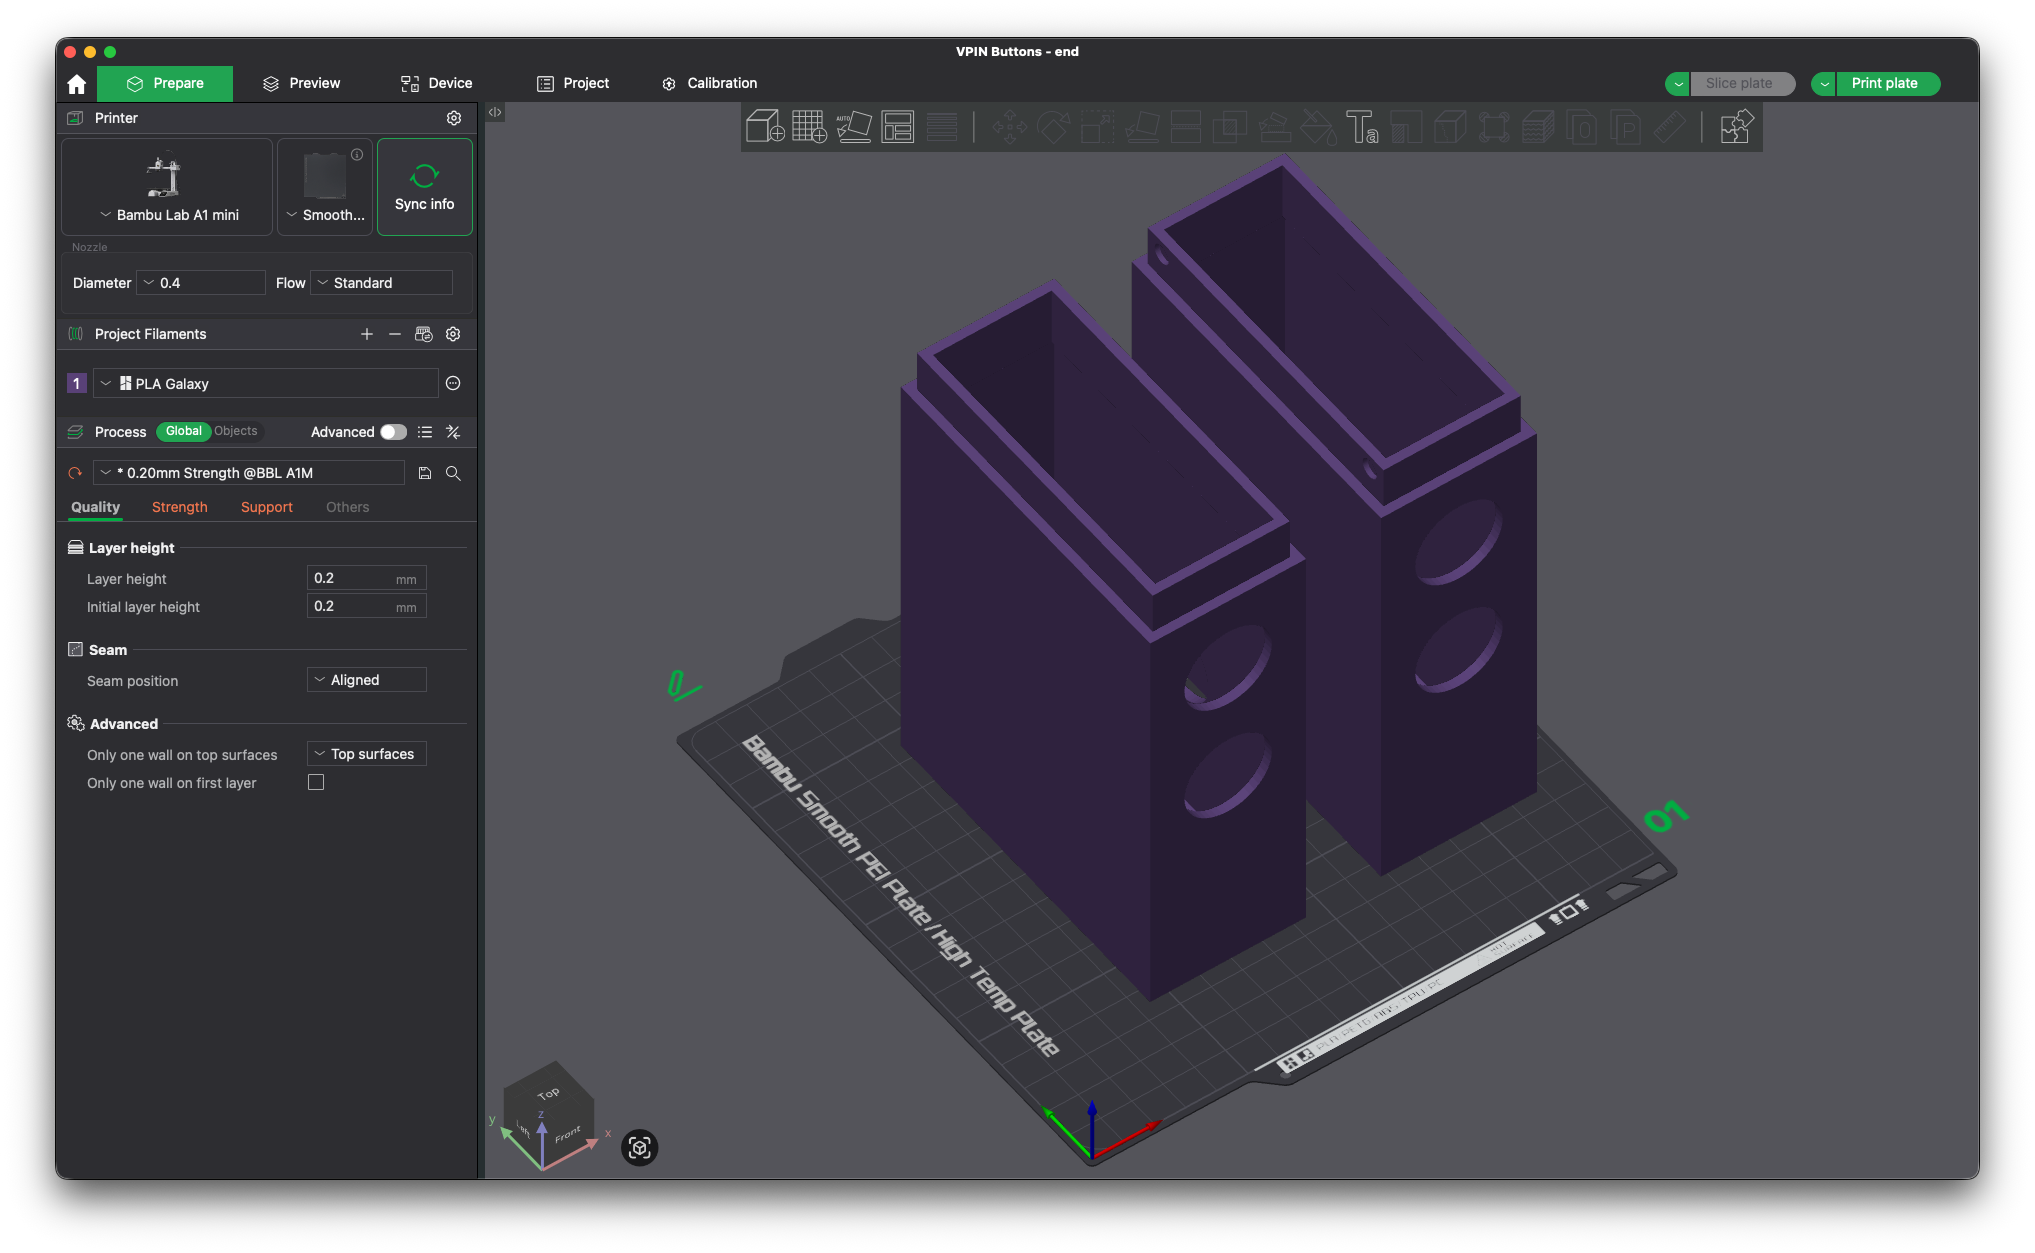
With that first bit dome, it was time to print the big boys, the side bits! (Fun fact: I'd end up reprinting that middle bit again anyways as I ran out of matte black, so decided to use 'purple galaxy' instead!). These side parts would be my biggest print to date, a 9.5 hour job, as I wanted to go with the 'strength' preset to be on the safe side. I was a bit unsure about tolerances, so went with a .2mm on either side and added in a couple of recessed circles with the idea I could insert a couple of tiny magnets to help keep things together.
Well, I need not have worried about them staying put. Once they'd printed and I tried putting the whole thing together, they were definitely tight. A little too tight! that was a big lesson in tolerances (and just how tiny 0.2mm is!) so lesson learnt for the future, but I wanted it to be sturdy, and sturdy is what I got!
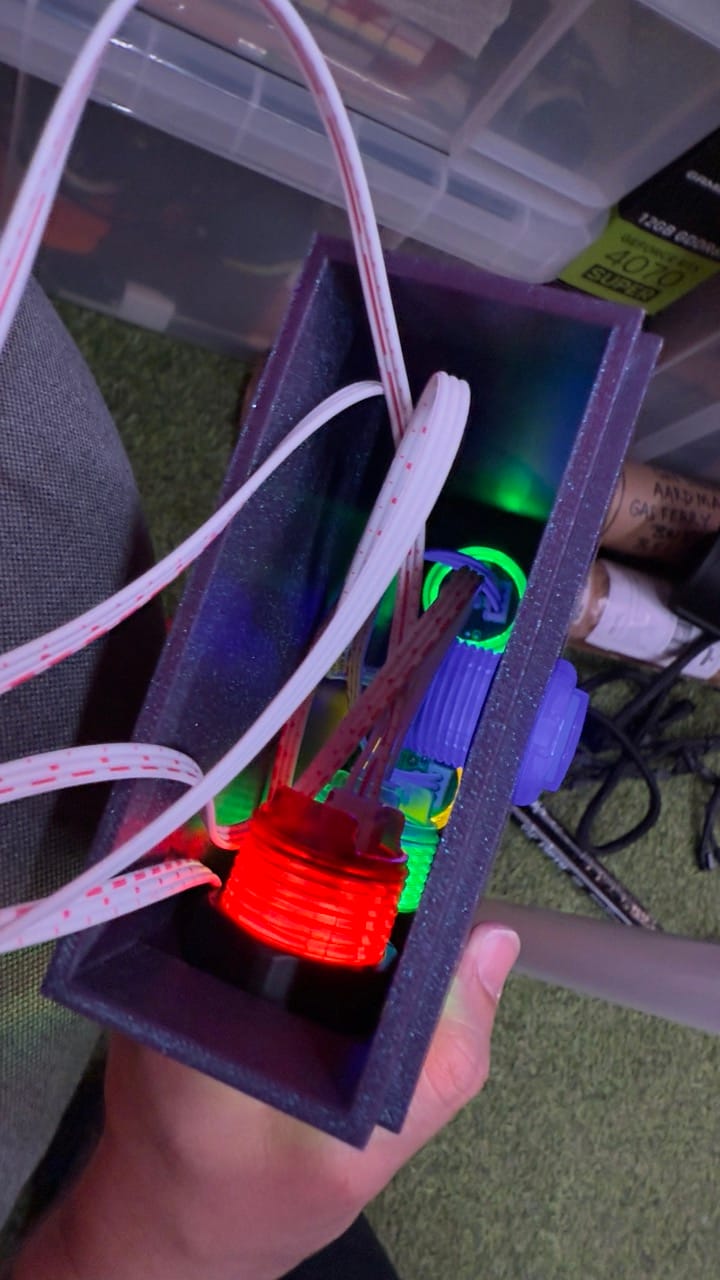
With all the parts printed, it was time to assemble with the electronics! What I hadn't thought about it how I was going to get my hands inside the end enclosures to wire up the buttons and secure them in place.
With the cardboard thing it all just opened up as it was an old box, but I hadn't considered how I would do that with an enclosed hard plastic box! Luckily for me I had added an extra hole for a 'nudge' button on top, which gave me an extra bit of access. I'm ashamed to say it took me way too long to realise I could just feed the wire through the holes and connect the buttons easily and then fit them into the enclosure. The first few buttons I was just prodding wires in a frenzy until my brain finally caught up.
After a while I got in the swing and it was going well. I had already set up VPX button mapping to use the correct button inputs and I didn't want to mess that up, so I had to take my time in ensuring I was rewiring the same button to the same place on the hardware as I had on the cardboard prototype.
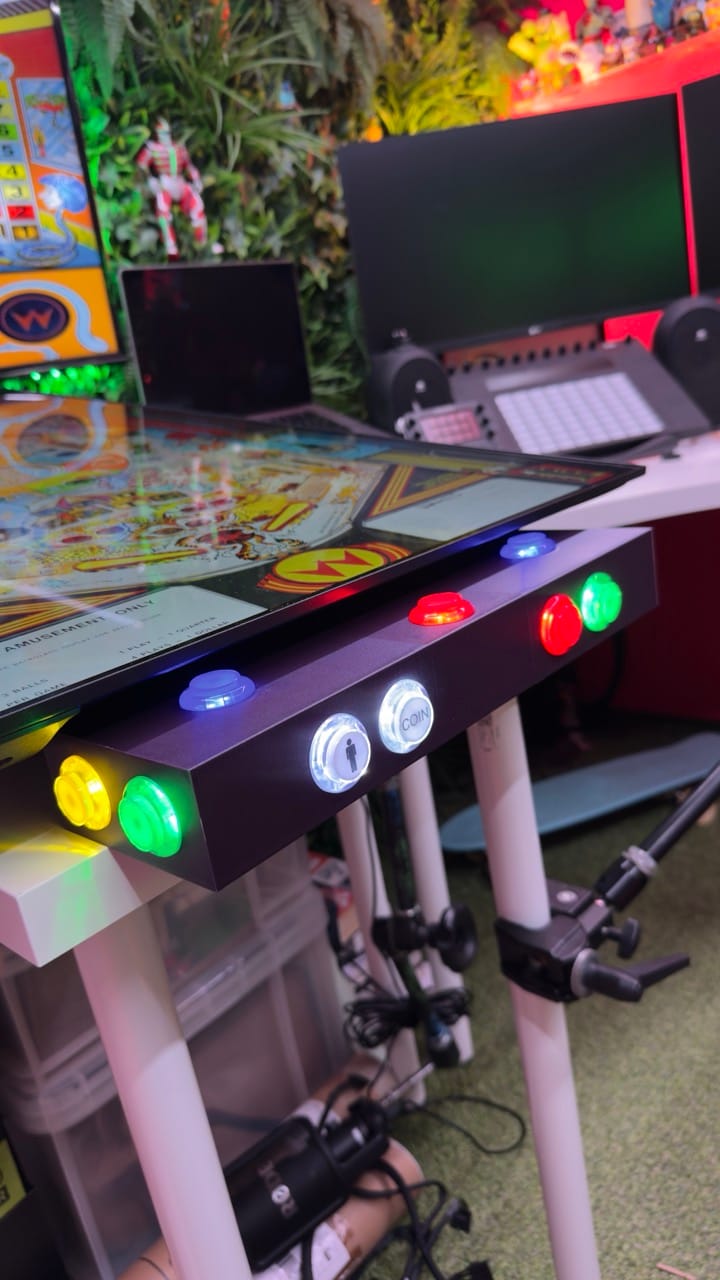
Before I closed it all up, I wanted to make sure it was working correctly and I hadn't bodged something whilst replugging everything in again. Luckily, it all worked grand and was glowing good and proper. Time to put it all back together and screw it to the table!
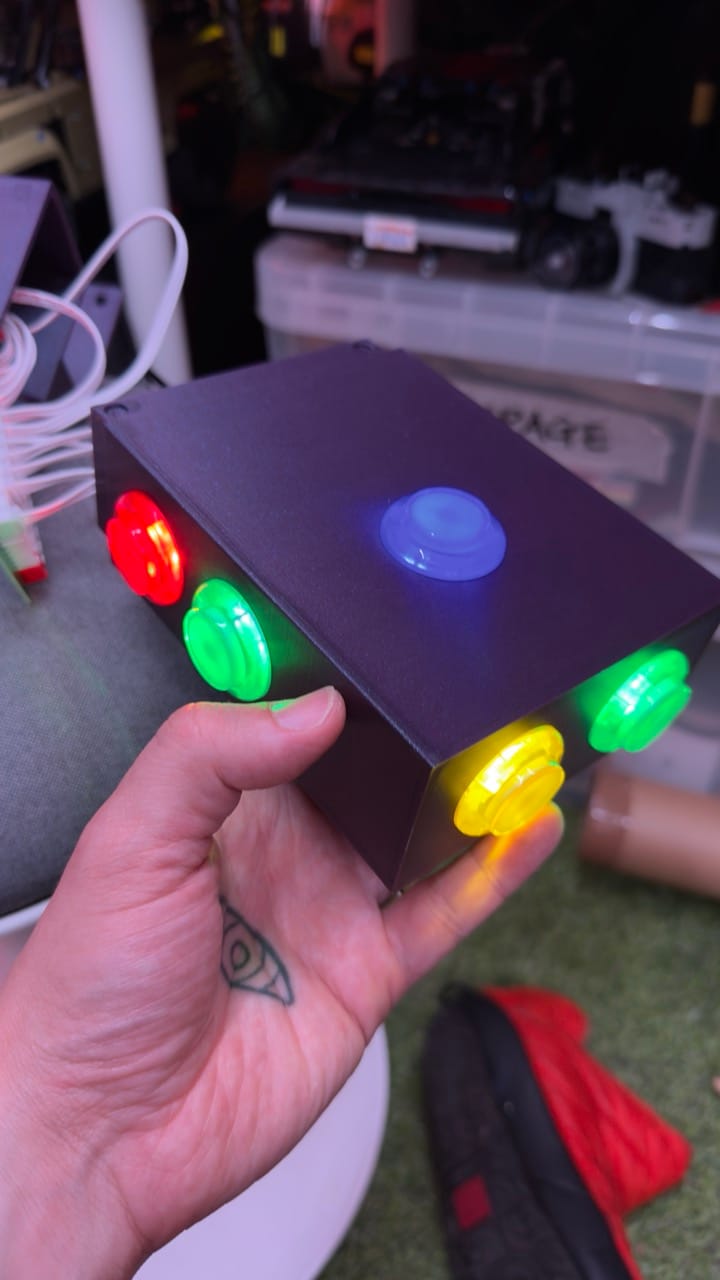
Ta-da! I was SO proud of myself, it's my first proper bit of 'engineering' to measure something up and create something bespoke to the space. It felt so good that it actually worked too! It sits in place nicely and makes it much more solid and much more 'real' (despite the buttons being in front of table, not to the side - that comes in the future!).

There we have it - part 1 complete, the story of how this new obsession took over, incredibly rapidly! I'm so happy I've fallen down this rabbit hole, I'm learning so much and have an absolute blast. The video below is the cabinet looking its best at the minute, running one of my favourite tables 'Scared Stiff', which is an absolute treat for the eyeballs!
There are SO many incredible virtual tables out there, maintained by so many talented artists. I'm discovering that what I really gravitate towards is the late 80s and early 90's Williams & Bally tables. The creativity on display on those games was incredible and the digital recreations are something to behold, especially when teams like V-Pin Workshop work their magic on them (particularly the tables using 'VLM' - essentially a blender toolkit that renders the lights realistically and reimports them back intp VPX as hi-res lightmaps).
Some of my current favourites, in no particular order:
- Tales of the Arabian Nights (Williams 1996)
- Creature From The Black Lagoon (Bally 1992)
- The Addams Family (Bally 1992)
- Fish Tales (Williams 1992)
- Police Force (Williams 1989)
- Metallica -Premium Monsters (Stern 2013)
- Bad Cats (Williams 1989)
- Radical! (Bally 1990)
- The Getaway - High Speed II (Williams 1992)
They're some of the best-looking tables, in my opinion. There is a vast number of virtual pinball tables out there and they are all are constantly getting modded or having visual overhauls, so it seems like an ever-changing community, which I love.
So, what's next!? This blog was entitled 'Part 1' because I very much envisage an evolution of all this stuff. Next up, I'm working with my good friend and master craftsperson Jack Hayward to build a bespoke wooden cabinet. I'm going to add an 'SSF' kit (surround sound speakers that vibrate the wood to simulate the ball rolling around) too. One day, in the very far future, I'll swap the playfield screen for a 144hz OLED, but that's a substantial investment!
There is one more rabbit hole that has opened up though, just this past week... designing my own virtual pinball table. After presuming it was too complex to even contemplate, after a few youtube videos it seems it is within my reach, especially as the way VPX works is using vector points to plot the shape of elements, I felt like it spoke to my Adobe Illustrator brain! I had a little nibble this week, finding the awesome skate-themed 'Radical!' table from 1990, made me realise that a reskin of that table with the neon designs of my 'Gnarlybot' Norbot sculpture would be a great place to start...
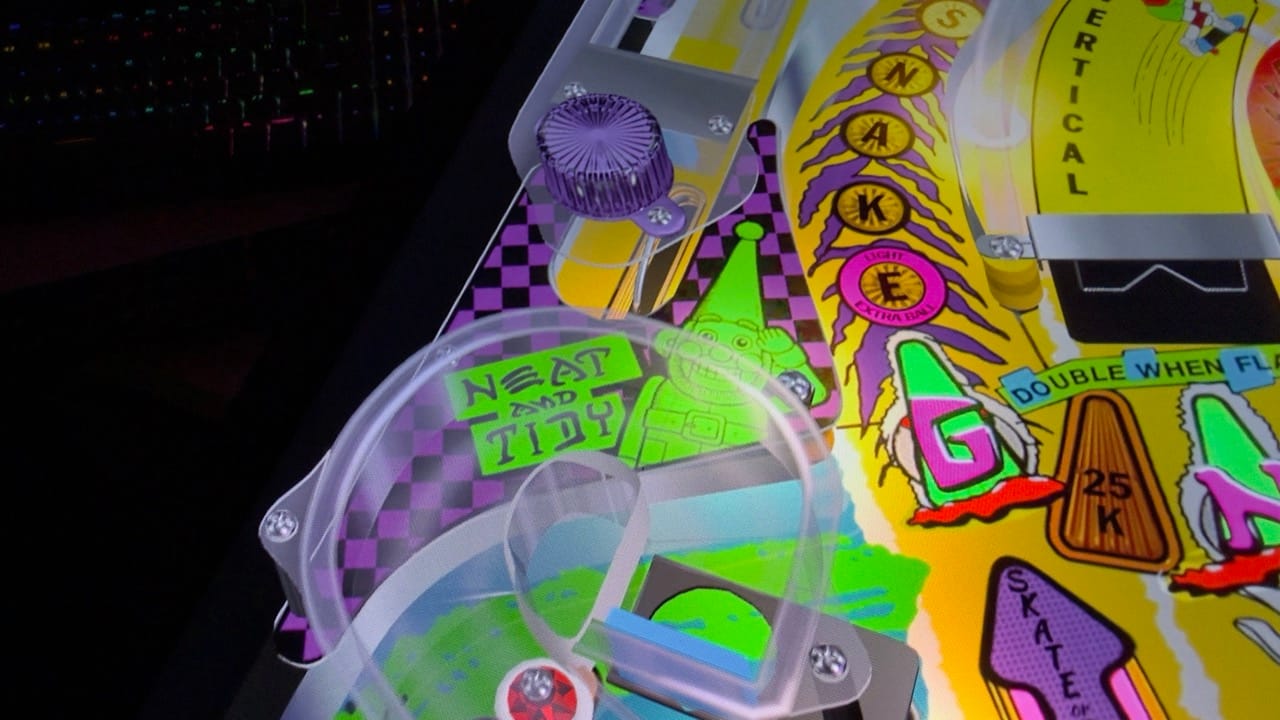
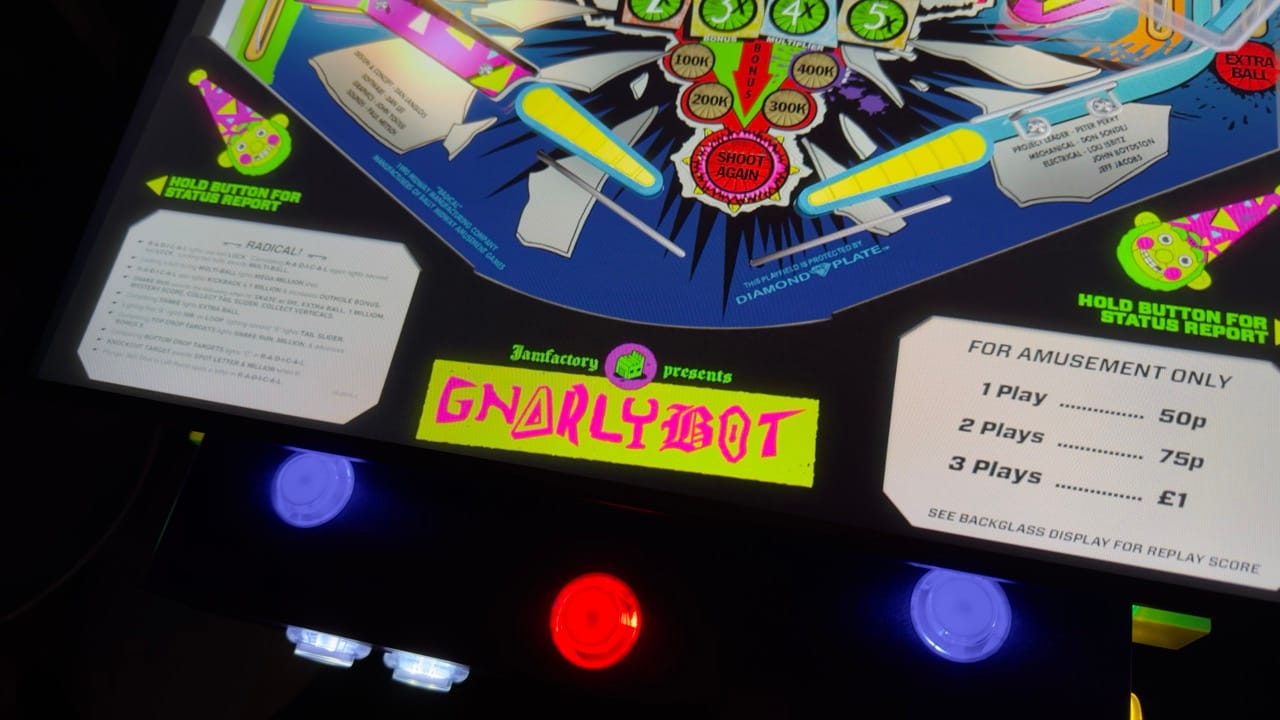
I can already feel myself falling further and further down that rabbit hole, as just spending one evening starting to reskin basic elements felt incredibly exciting - watch this space!
Thank you for reading this mega-blog, I think at 4,406 words it's me biggest one yet! I hope you find this as interesting as I did writing it - I'll be sure to post a follow up in the future!
In the meantime, here's some links to get you started if you're pin-curious..
Big loves,
- Gav.